Run Facebook Ads? What about Instagram Ads?
If you do, there’s no question about it— Having your Meta pixel set up is essentially a need for strong campaigns, not just a simple recommendation.
Your Meta Pixel (formerly known as the “Facebook tracking pixel” or the “Facebook conversion pixel”) can expand your campaigns and your analytics significantly, opening up opportunities like better conversion tracking, retargeting potential, and more.
So is your meta pixel installed and optimised for data tracking? In this post, we’ll show you how to set up your Facebook/Meta pixel, as well as discuss some of the pixel’s limitations and how to work around them.
What is the Facebook Pixel?
The Facebook pixel— aka the Meta pixel (we’re just going to use the terms interchangeably)— is a small snippet of code that you’ll install on your website.
This snippet of code allows Facebook to track user data in a relatively privacy-friendly way (all things considered). They can:
- See when users click on a Facebook Ad or Instagram Ad and then convert, giving you conversion data that you can use to optimise your campaigns
- Use ad performance data based on user actions on your site after a click to optimise and automate your campaigns for improved performance, including showing your ads to users most likely to convert moving forward
- Set up retargeting campaigns, including those that allow you to show users ads based on specific pages viewed or actions taken on your site
Better tracking, better optimization, and more opportunities to push warm audiences through the funnel (or to engage them with cross-selling or up-selling).
In other words, you need the Meta Pixel. Even though it does some have limitations (which we’re going to talk about in a few sections), it can still share an enormous amount of data with advertisers that you need to accurately assess and improve your campaigns.
How to Create & Set Up Your Meta Pixel
If you don’t already have the newer version of the Facebook pixel (which rolled out a few years ago), you need to start by creating one.
To do that, head to your Events Manager. You’ll see a tab for your Facebook Pixel, along with the option to “Set Up Pixel” if you haven’t already. Click the green CTA to get started.

First, you’ll want to choose how to install your pixel code. Either option works equally well, and we’ll look at how different options in the next section. If you have an integration or tag manager from your CMS or eCommerce platform, that’s definitely the easiest option, but we’re going to look at how to copy and paste the code since it will work for anyone.
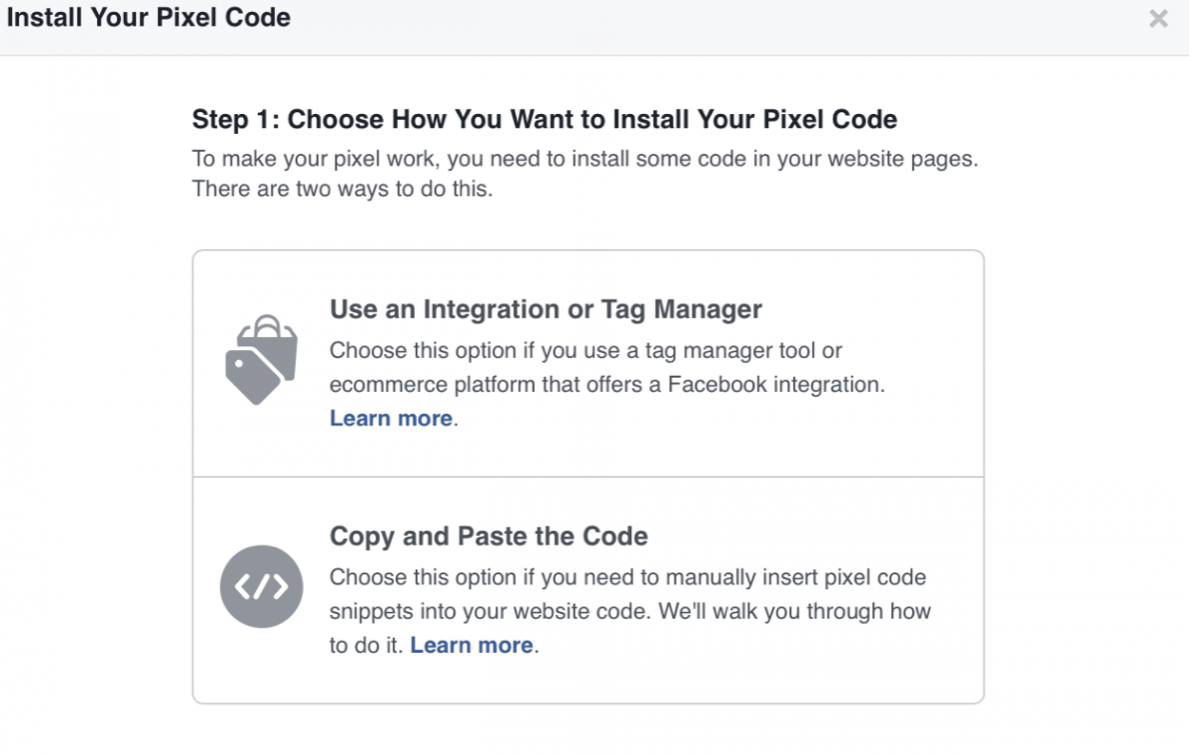
If you choose to copy and paste the pixel snippets into your website code, you’ll be given step by step instructions along with the pixel code. It will explain how to find the <head></head> tags on your site so you can insert the code there.
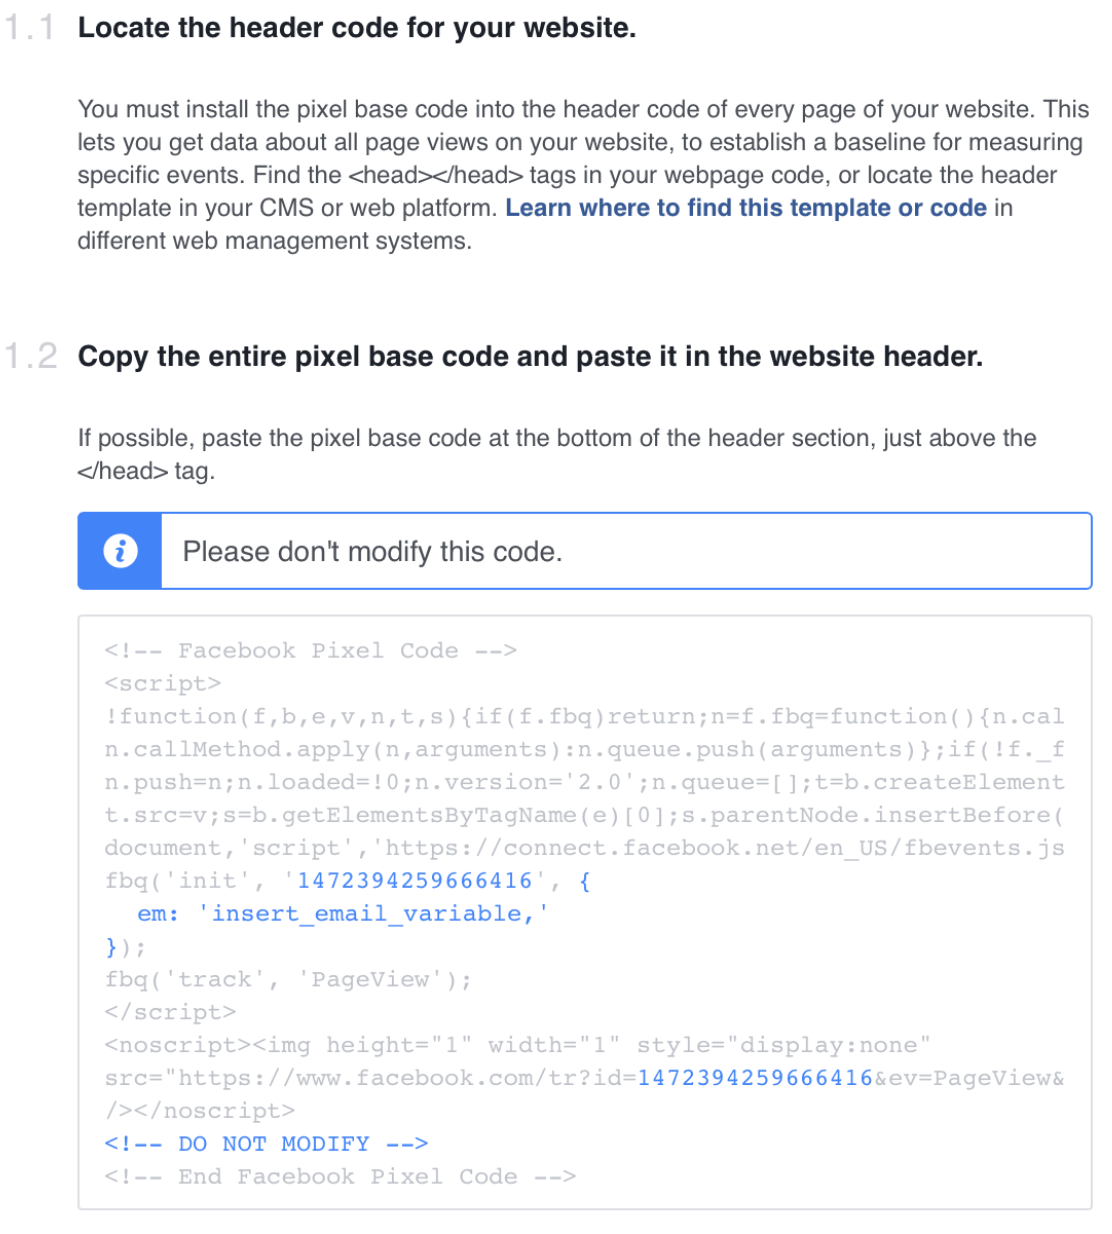
Copy and paste the pixel code exactly as it is and in its entirety. Don’t modify it. Place it in the appropriate place on your website, whether it’s in a designed tracking area (offered by some platforms like Shopify) or by copying it into your site.
Once your pixel is installed, you can test it to make sure that it’s working. We’ll look at how to do that in just a few sections.
Customising Events for The Meta Pixel
For improved data, you need to set up Events with the Facebook pixel. This will help you assess accurate ad performance and improve it in the future.
Events you can track may include:
- Page views
- Completed purchases
- Abandoned carts
- Lead forms completed
- Custom conversions
It’s important to set up different types of conversions so Facebook can more accurately track them. Someone clicking to your site isn’t automatically a conversion or a successful campaign, for example, if what you really want is to drive purchases.
And keep in mind that Facebook will use conversion data to determine who to show your campaigns to in the future. You don’t just want users who click; you want people who complete the target action.
In order to track events, you need to set them up.
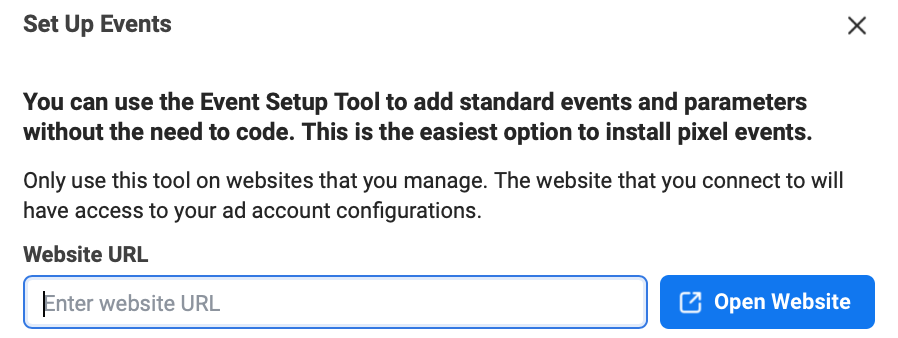
Meta’s pixel has actually streamlined this significantly. You can use their Events Set Up tool without any need for code while still installing pixel events.
Enter in your website to connect to it. This site will then have access to your ad account configurations, and you can add different events to each page as needed.
How to Install the Facebook Pixel on Your Site
There are a few different options when it comes to installing the pixel on your site, and they’ll vary depending on which CMS or eCommerce platform you’re choosing.
If you’re using a platform with a simple integration or tag manager option, that’s the best way to go, but let’s take a look at some of the different methods you can choose from.
Using Code
The first option here will work universally… but you need to understand a bit about how coding works.
First, when you create your pixel, you’re going to copy that bit of code given to you. As a refresher, it looks like this:

Then you’re going to head to your website, and access its code. In this example, we’re using a WordPress site and are editing the theme’s header. A quick search for <head> will help you find the right place. It may look like this:

Copy the code in between the two <head> markers and you’re all set.
WordPress
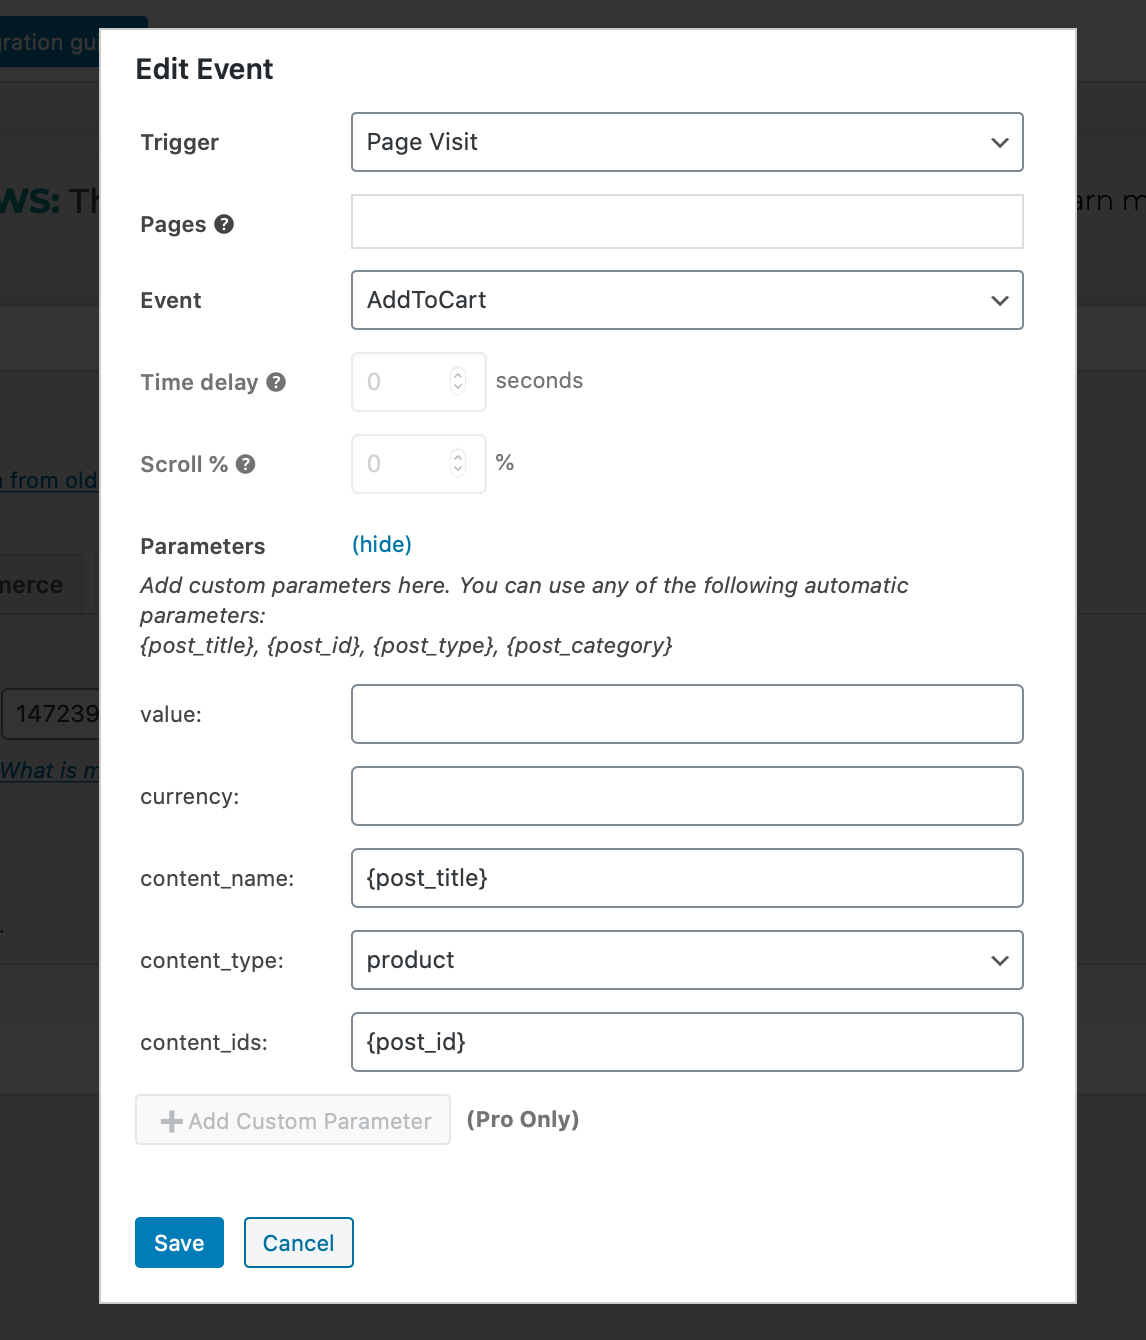
WordPress is one of the most common CMS systems out there. You can use the coding methods above, or you can use third-party plugins to make the integration much easier.
Facebook Pixel Cat is a good one, and even their free “lite” version allows you to set up the Pixel and install very basic events.
Install the plugin, and then all you need to do is copy your pixel ID into it. You can find this in the Facebook Events Manager under settings:
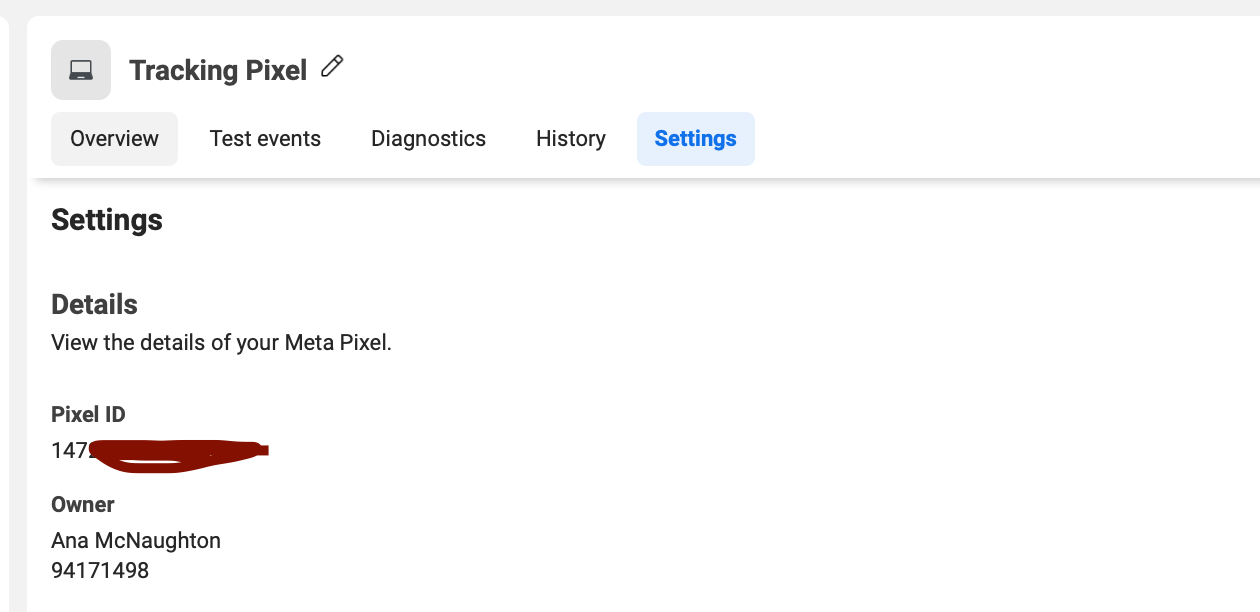
They’ll set up the pixel for you, and adding events takes just a few clicks.
Shopify
Shopify is the exceptionally popular CMS that we wanted to take a look at, due to the sheer number of users utilising the platform.
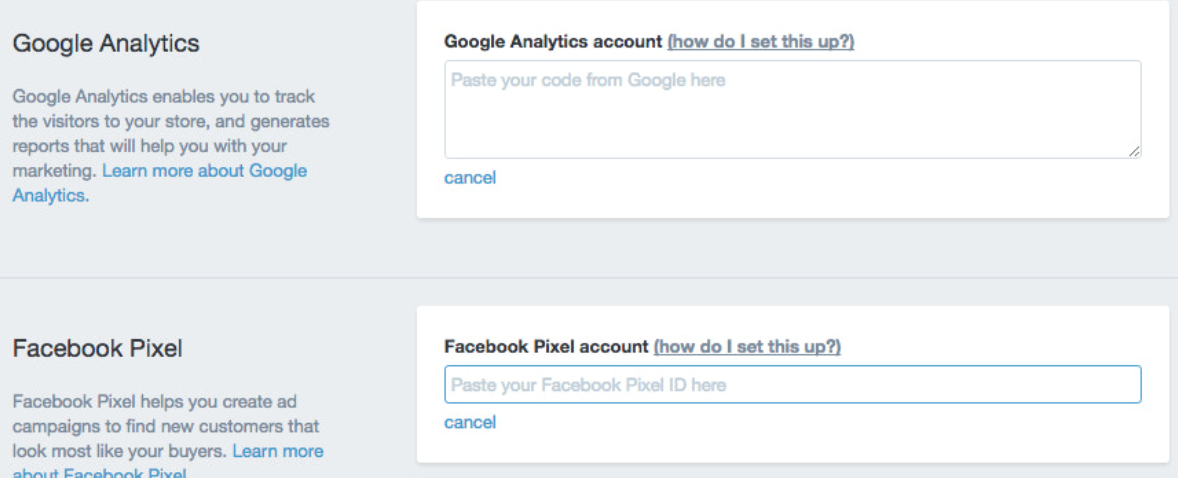
Shopify also has easy pixel set-up.
Go to your Shopify account, and then click on “Online Store” and then “Preferences.” You’ll see a spot where you can add your Google Analytics tracking code, and one for your Facebook pixel. Just copy and paste your pixel ID into the field, just as you did in the example with the WordPress plugin above.
How to Make Sure Your Meta Pixel is Working
The Facebook pixel is exceptional… but only when it’s working correctly.
The last thing you need is to not have it set up properly and wind up with little or no data as a result.
Fortunately, there are ways to test to make sure that your Facebook analytics data coming from the pixel is as complete as possible.
In the pixel section of the Facebook Events Manager, you’ll see a “Diagnostics” section. This will flag all current and past issues that have been identified. The “History” tab will show you any changes recently made to your pixel.

You can also use the “Test events” tab to ensure that individual events are tracking. You enter in your site, take action of the event on your site, and make sure that it registers on Facebook. The action will show up on the testing page if it was tracked.

What About The Meta Pixel’s Limitations After iOS 14?
By now, you’ve likely heard about how the Facebook pixel has some limitations. We discussed it regarding changes to Facebook data tracking after iOS 14.5.
To confirm: Yes, the Meta pixel absolutely has some limitations and its efficacy was reduced by the iOS update.
As a quick recap, that update set up new privacy-centred features for users. They had to opt-in to third-party data tracking instead of having it be the default. And in a surprise to no one, the majority of users did not enable that tracking opt-in, though some users have added it since.
For users who opt-out, Facebook won’t get accurate data because their conversion pixel doesn’t work.
There is a workaround to this, and it’s Facebook’s Conversion API. This allows your system to send data from your website’s server directly to Facebook for retargeting, data optimisation, and more.
Because you’re not relying on third-party pixels and its first-party data, it’s a solid workaround.
As a result, we strongly recommend that all advertisers are using both Meta’s pixel (for ease of use) and the Facebook Conversions API for its thoroughness. Together, the two fill in all the gaps and can improve ad performance and reporting.
How to Install Facebook’s Conversions API
Want to install Facebook’s Conversions API? It’s exceptionally easy to do.
Head back to your Events Manager if you’ve left, and then find your “Settings” again.
When you scroll, you’ll see a section about the Conversions API.
There are multiple different options when it comes to setting this up, as you can see here:

You can use the Conversions API gateway, which doesn’t require any coding but does require access to your cloud and DNS provider accounts. Facebook provides instructions for this.
The second option is to set up the Conversions API manually. You can see the instructions here to see if this is something you’d want to do.
And finally, you can use partner integrations, which can include WordPress, Segment, and more. Like the integration options for the Meta pixel we’ve looked at, this is exceptionally easy and streamlined. If you have access to one of these tools, we’d recommend going that route. It’s a bit faster and less prone to potential human error.
The Facebook Pixel FAQ
Still have any questions about Meta’s tracking pixel? Here’s some of the core information that you need to know.
How does Facebook’s pixel work?
Facebook’s pixel works like a tracking cookie. You install a snippet of code on your site, and that code fires when a certain action is taken. When users start checkout, for example, the checkout page is loaded and the pixel tracks it.
This data is sent back to Facebook.
What are the core benefits of the Meta pixel?
Facebook’s pixel offers the following core uses and benefits:
- Allows for site-based retargeting
- Tracks conversion data after users click on an ad
- Optimise your campaigns based on user conversion data
Does the Facebook pixel violate users’ privacy?
The simple answer to this is no. Facebook will only tell you how many users converted after clicking, for example, not which ones.
You also won’t be able to see which users have viewed certain pages or taken different site activity— Facebook utilises user ID’s behind the scenes to match your retargeted ads with the right users.
What about the Facebook pixel limitations following iOS 14.5?
We briefly discussed this above. The limitations are real, but the overall data you still get from the Meta pixel is still worth it.
To counteract this, however, we do recommend using the Facebook Conversions API. Check out the previous section for more info.
Final Thoughts
The Facebook pixel isn’t perfect, but it’s an essential tool that all advertisers should have set up and properly installed. It can and will absolutely impact your campaigns, especially since Facebook does so much of the heavy lifting behind the scenes to show your ads to users who will take the actions you want.
This is why, of course, it’s also important to set up event tracking and to choose the right objective for each ad campaign.
Over time we may see new versions of the pixel since we already have in the past, but for now, the combined use of the pixel and the Conversions API is the best way to go.
Want to learn more about improving and tracking your Facebook Ads? Check out our Facebook Marketing course here.


.png)
.png)


